Batch process
The batch processing is a very useful tool to process the repetitive tasks such as changing the size or type of an image file.
To start the Batch Process tool
- Choose File > Batch Process from the menu.
- Click
 icon in the tools panelor the Main Tool Bar and click Batch Attributes tab.
Tool Options
After batch processing tool is started, Batch attribute panel is appeared in the tool options’s location and the list of files to work is appeared like below image.
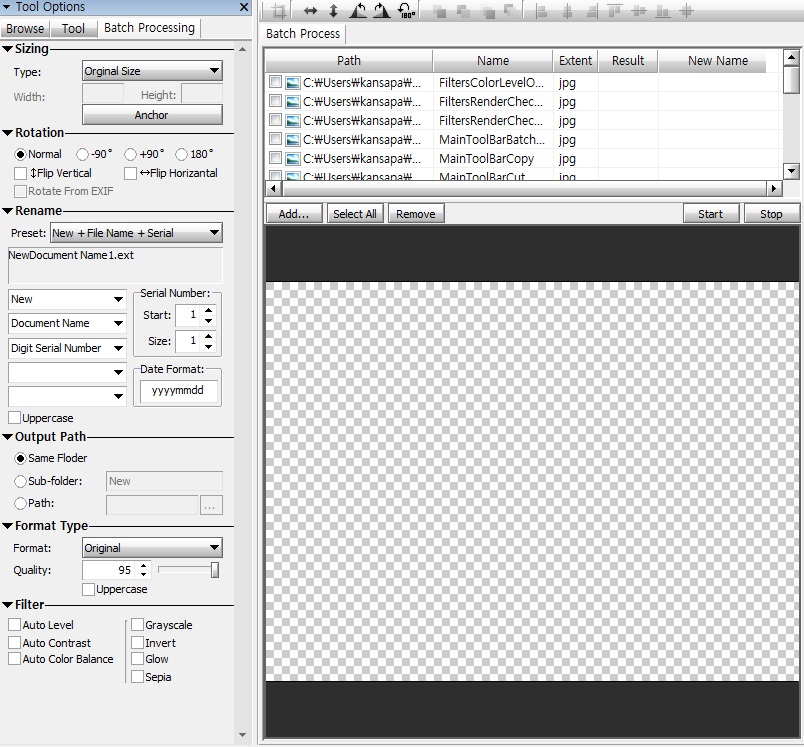
The batch processing’s tool options is consisted of five parts: Resize, Rotate, Rename, Output, Filters.
-
Resize
Resize part allows you to chnage the value of the image’s width or height and anchor that is base point of the image.
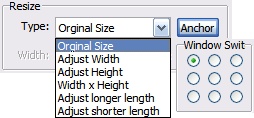
Type
This determines the method that is used to resize the image.
-
Original Size
By default, the image is not resized.
-
Adjust Width
This adjust the size of the image based on the width of the image. The height of the image is automatically adjusted based on the ratio of the original image.
-
Adjust Height
This adjust the size of the image based on the height of the image. The width of the image is automatically adjusted based on the ratio of the original image.
-
Width x Height
Adjust the width and height respectively. The ratio of the image will be ignored.
-
Adjust Longer Length
This adjust the size of the image based on the longer-axis of the image. The shorter-axis of the image is automatically adjusted based on the ratio of the original image.
-
Adjust Shorter Length
This adjust the size of the image based on the shorter-axis of the image. The longer-axis of the image is automatically adjusted based on the ratio of the original image.
Anchor
Anchor is the base point of the image. Every objects in canvas is located based on anchor. You can select one of eight directions or center point. For example, you have three diffrent images that have the diffrent size of each other. Now you want to put the logo on the bottom right corner of the images. First, you can put the logo by defaut setting that anchor is setted left top corner. But logo of the small size of the image is visible but the logo of the large size of the image is invisible. How to correct this problem? You can just set the anchor to bottom right.
-
-
Rotate
This part allows you to rotate the images using following six optinos.

-
Rename
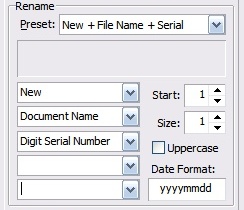
This part allows you to edit the name of the files. For editing the name it provides five combo-box that includes five items: Blank, Text, Document Name, Digit Serial Number and Date. The blank or text allows you to edit text you want. The Document Name refers to the original file name. Digit Serial Number is a very useful option to label the digit number to the files.
-
Preset
Preset is set of the pre supported
-
Start
Start set to the start of a serial number. This option is only available when the Digit Serial Number is selected.
-
Size
Size adjust the number of 0. This option is only available when the Digit Serial Number is selected.
-
Uppercase
Uppercase will cause the output file name to be uppercase.
-
Date Format
Date Format allows you to chage the date format that you want. By default, year is represented by “yyyy” but you can represent the last two digits of years using the “yy”. For example, you can represent like “09-01-01”, you can edit the date format to “yy-mm-dd”. This option is only available when the Date is selected.
-
-
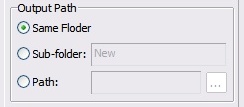
Output Path
-
Same Folder
This option will cause the result image to be stored in the original image’s path.
-
Sub-Folder
This option will cause the result image to be stored in the specific folder of original image’s path.
-
Path
This option will cause the result image to be stored in the specific path.
-
-
File Format

-
Format
Format allows you to change the file format.
-
Uppercase
Uppercase will cause the filename extension to be uppercase.
-
Quality
This option is avaiable in JPEG format. It allows you to set the compression level, which ranges from 0 to 100. The default quality of 95 usually produces excellent results, but in many cases it is possible to set the quality substantially lower without noticeably degrading the image.
-
-
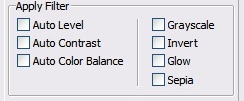
Apply filter
In Batch Processing seven filters are supported. This is applied only background layer.
