Hierarchy
Hornil StylePix supports four object type and group object. Each object appear as a layer in hierarchy. The Hierarchy allows you to manage layers and their attributes.
The Hierarchy is located bottom of the right side.
To display the Hierarchy, choose View > Window > Hierarchy or press F4.
The below image shows canvas and Hierarchy that consist of several layers. The Hierarchy is consited of top controller, layer-tree and toolbar.
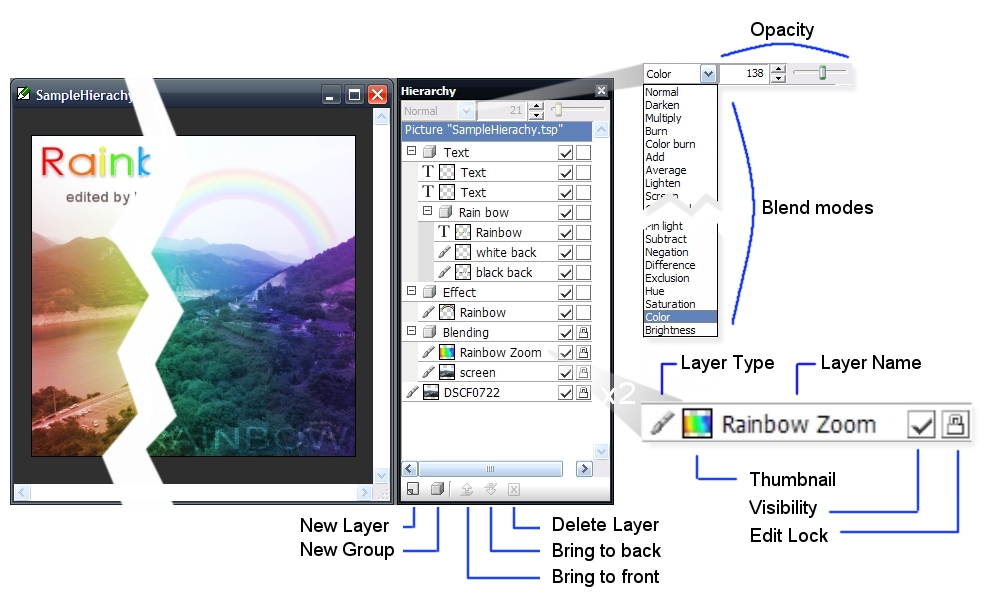
Top Controllers on Hierarchy
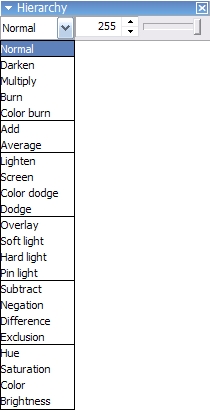
The top controller is consisted of blend mode combo box and opacity controller. You can change the blend mode of layer by combo box. The top controller is activated only when current selected layer is not locked.
-
Blending Mode
Blending mode in Hornil StylePix are used to determine how two layers are blended into each other. For more details, see blending modes.
-
Opacity
The opacity represents the amount of transparency a layer has. Opacity ranges from 0 to 255, with 0 meaning complete transparency(that is, invisible), and 255 meaning complete opacity. You can change the opacity of layer by opacity controller.
The below sample image shows three differnt status of opacity.
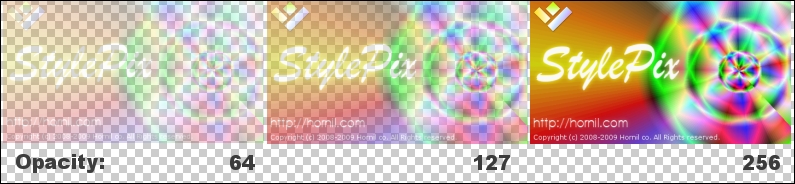 Three diffrent status of layer opacity
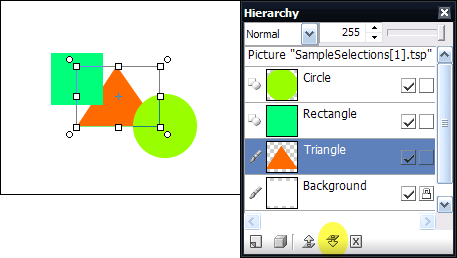
Layer Tree
The layer tree represents the structure of the current active canvas.
-
Picture
The pricture is anchored in the top of layer tree, it’s not a layer. The picture is existed to provide information of entire image.
-
Layer
The Layer is used in Hornil StylePix to separate different objects of the canvas. Layers are like transparencies stacked on another. For more details, see layers.
-
Layer Type
The layer type shows type of layer. Hornil StylePix supports
 Image ,
 Shape ,
 Text ,
 Path and
  Group for managing. For more details, see Objects(Layer Types).
 -
Thumbnail
Hornil StylePix provides five thumbnail size such as following:

To change the thumbnail size, choose Object > Thumbnail Size.
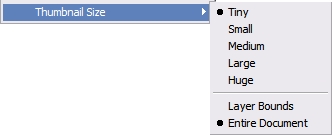
Layer Bounds / Entire DocumentThere are two ways of the thumbnail view. The layer bounds mode shows the only existing area. but entire document mode shows the real position and size in entire canvas. The below images are shows two ways of the thumbnail view.
 Layer Bounds
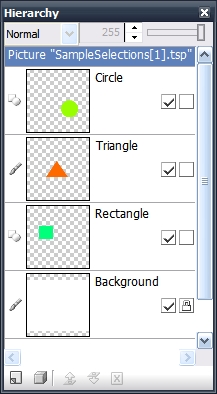 Entire Document
 -
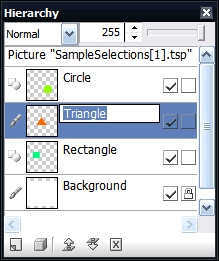
Name
Every layer has a name. You can change the name of a layer either by double-clicking on it.
 changing the name by double-clicking
 -
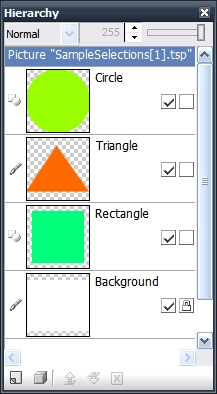
Visibility
The layer visibility determines whether or not the layer is currently visible in the canvas. It is possible to temporarily remove a layer from an image, without destroying it. You can set the visibility to check the second check box at the end of the layer.
-
Edit Lock
The edit lock determins whether or not the layer is editable. If layer is locked, you can’t select the layer by Select And Move tool. You can set the edit lock to check the check box at the end of the layer.
-
Hierarchy ToolBar
The Hierarchy toolbar allows you to manage layers such as following:
-
New Layer
The new layer command allows you to create and insert the new layer on the current selecting layer position.
-
New Group
The new group command allows you to create group object. If you select the layers before perform this command, the selected layers are move to the newly created group.
-
Bring forward
A layer with greater stack order is always in front of an object with a lower stack order. The bring to front and bring to back commands allows you to change the stacking order of layer.
 Original stacking order
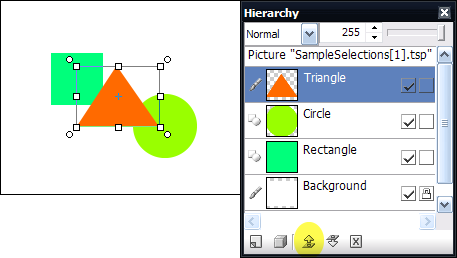 Bring forward
 -
Send backward
 Send backward
 -
Delete Layer
The delete layer command allows you to delete the current active layers.