 Brush
Brush
The Brush tool allows you to draw a picture you want on the layer.
To start the Brush tool
- Choose Edit > Tool > Brush from the menu.
- Click icon in the tools panel.
- Press B key.
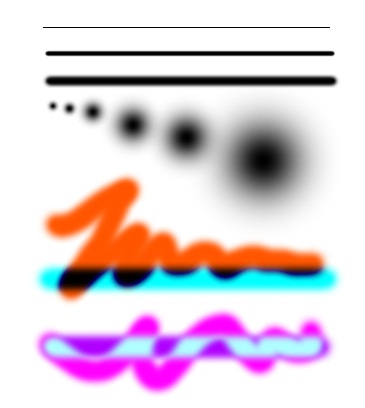
The below example image shows the brush with the various options. To draw a picture like below image, choose the foreground color you want and left click and drag the mouse on the canvas.
- You can draw a straight line by brush tool with pressing Shift key.
Brush Options
The brush tool provides the following options: Size, Antialiasing, Edge, Distance, Blending, Color and Opacity. The edge option is only available when theAntialiasing option is checked.
-
Size
The Size defines the size of the brush’s dot.
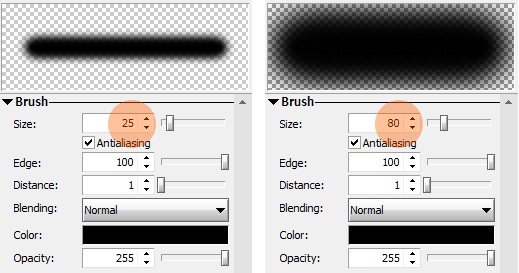 Brush Size
To adjust brush’s size, set the size controller or click the left mouse button and drag up or down until it meets size you want on preview window.
In addition, You can change the brush size by menu and shortcut keys.
- To increase sizeclick ] or Shift + ]
- To Decrease Sizeclick [ or Shift + [
Note- The default increments size is 1-pixel. But if you press Shift key before [ or ], the increments size will be 10-pixel.
-
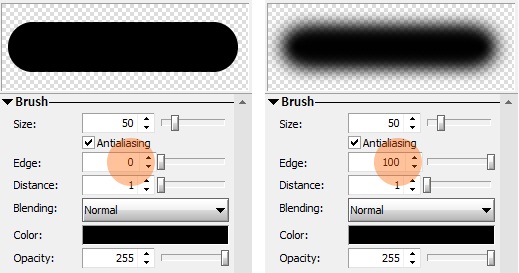
Antialiasing
For more details about, see Anti-aliasing(wikipedia).
You can adjust the anti-aliasing of the brush’s dot using the anti-aliasing check box and edge controller.If you turn off the anti-aliasing check box, the edge is ignored.
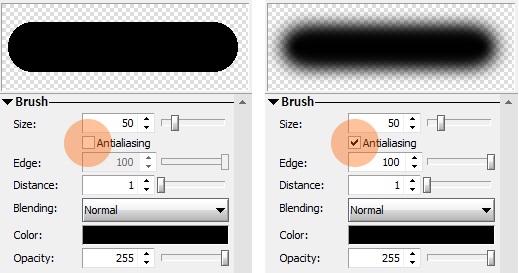 Antialiasing option
 -
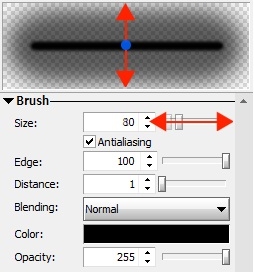
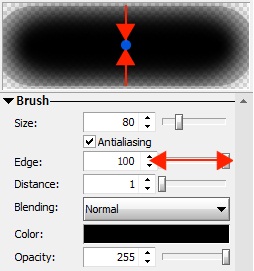
Edge
The Edge is smooth area of the brush border. This is only available when the Antialiasing option is checked. A higher value will fill more of a multi colored image and conversely, a lower value will fill less area.
 Edge
EdgeTo adjust Brush’s edge click the preview window with right mouse button and drag to center until it meets brush’s edge size you want.
-
Distance
The distance defines a distance between the previous brush’s dot and the current dot.
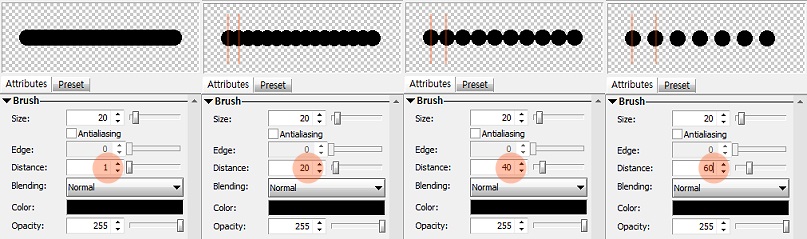 Distance
 -
Blending
Blending in brush tool is used to determine the brush stroke is blended into the layer. For more details about Blending, see Blend Modes. You can make various effects such as following using it.
 Bleding
 -
Color
It defines a color of the brush. You can change it using color panel.
-
Opacity
It defines a opacity of the brush’s color.
Advanced Options
The advanced options are only available in Hornil StylePix Pro. You can create a own brush with these options.
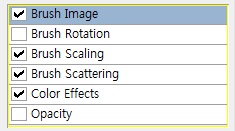
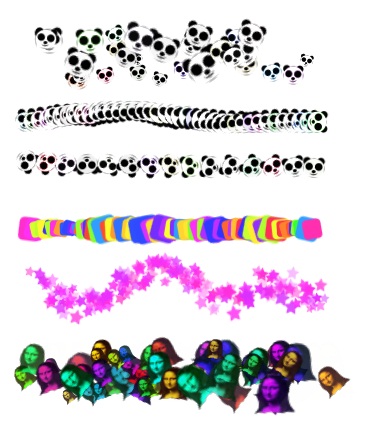
The following image shows the various apperance of the brush with the advanced options.
-
Brush Image
You can make own brush using the existing image. The brush image option allows you to change the brush’s image.
To change the brush’s image
- Click the image’s privew box.
- The image selecting window is popped.
- Select category and double click the wanted image.
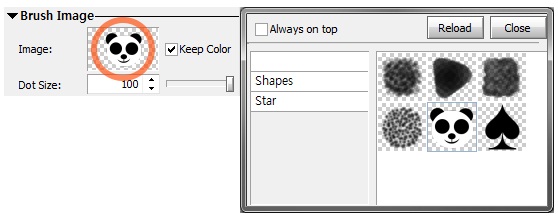 Brush Image
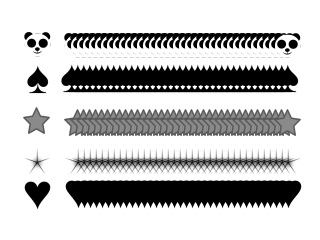 Brush Image
 -
Brush Rotation
This option defines the value of the rotation between the previous point and the current point.
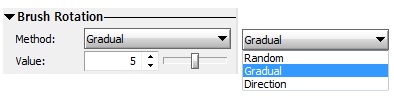 Brush Rotation
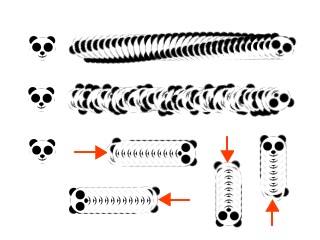 Brush Rotation
 -
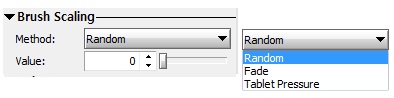
Brush Scaling
This option defines the value of the scale of the brush.
 Brush Scaling
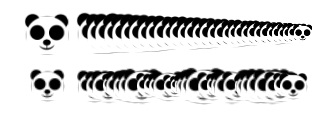 Brush Scaling
 -
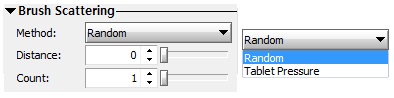
Brush Scattering
This option defines the degree of the brush.
 Brush Scattering
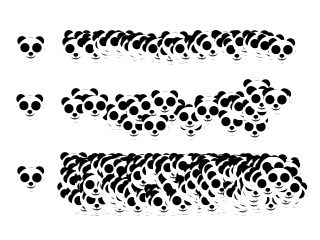 Brush Scattering
 -
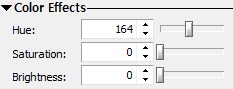
Color Effects
This option defines the value of the hue, saturation and brightness of the each brush point.
 Color Effects
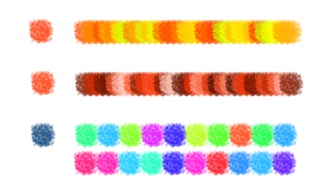 Color Effects
 -
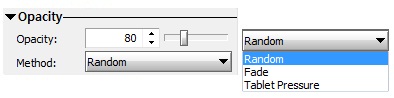
Opacity Effects
This option defines the value of the opacity of the each brush point.
 Opacity Effects
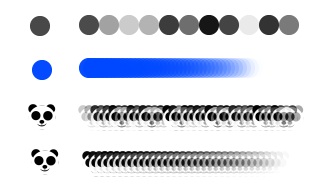 Opacity Effects